- 제공 기능
1) A centralized platform to securely store and manage encryption keys, credential files, Oracle wallets, and Java keystores.
- Manage the key lifecycle, including creation, rotation, and removal, for all endpoints
- Prevent the loss of keys and wallets due to forgotten passwords or accidentally deleted wallets and keystores
2) Easy enrollment and provisioning of endpoints
3) The ability to work with other Oracle products - 기본 아키텍처
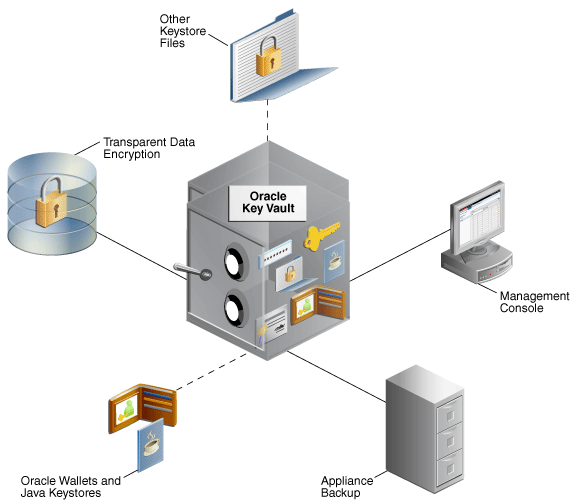
1) Transparent Data Encryption refers to Oracle databases that have tables and tablespaces configured to use TDE
2) Other Keystore Files can be JCEKS keystores that you upload to Oracle Key Vault from endpoints or download from Key Vault to endpoint
3) Management Console refers to the Oracle Key Vault graphical user interface, in which you log in to manage objects that you upload to Key Vault
4) Appliance Backup refers to a backup device for Oracle Key Vault data, which you configure for a high availability environment
5) Oracle Wallets and Java Keystores refers to the wallets and keystores that you upload to Oracle Key Vault and download to endpoints - 구성 절차
1) Install and configure Oracle Key Vault
2) Configure a high availability environment for your Oracle Key Vault endpoints
3) Create users to manage the day-to-day tasks for Oracle Key Vault
4) Add endpoints so that users can use Oracle Key Vault to store their security objects
5) Manage the Oracle Key Vault virtual wallets
6) Enroll endpoints and then upload or download security objects between the endpoints and Oracle Key Vault
7) Manage the endpoint data
8) Perform periodic maintenance tasks 인프라 구성
1) 서버 사양
- cpu : 최소 2 x86 cores (Intel Westmere or later)
- memory : 최소 4GB 이상
- Disk : 최소 500GB 이상
- Network interface : one network interface
- os : oracle linux release 5 update 10
2) 네트웍 포트Port NumberProtocolDescriptions22SSH/SCP Port
Used by Oracle Key Vault administrators and support personnel to remotely administer Oracle Key Vault.
See the description of the Network Services pane under "Settings for Configurations Page".
443HTTPS Port
Used by web clients such as browsers to communicate with Oracle Key Vault.
1522Database TCPS Listener Port
Listener Port
Used for communication between the Oracle Key Vault primary and standby appliances in high availability configurations.
5696KMIP Port
Used by Oracle Key Vault endpoints and third party KMIP clients to communicate with the Oracle Key Vault KMIP Server.
3) install 과정
- IP, network mask, gateway 확인후
- key vault cd insert
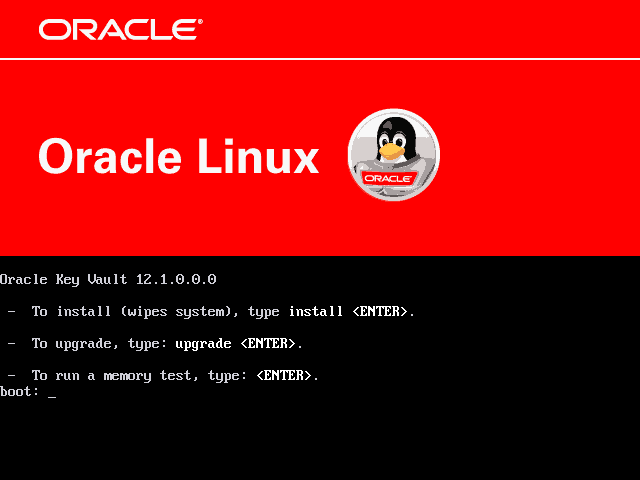
=> install 입력
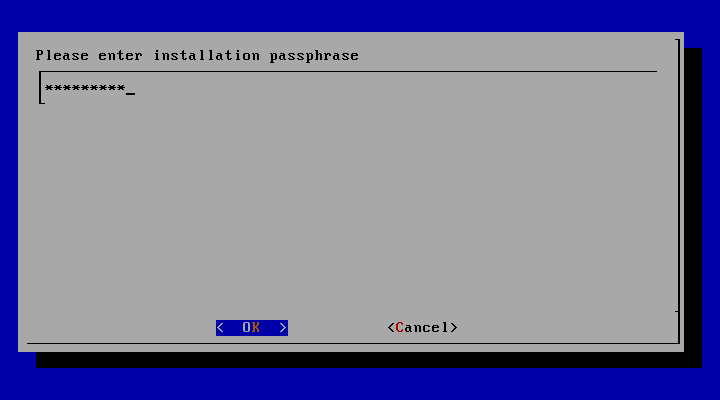
=> install password 입력 (대문자, 소문자, 숫자, 특수기호 포함하여 8자 이상 입력)
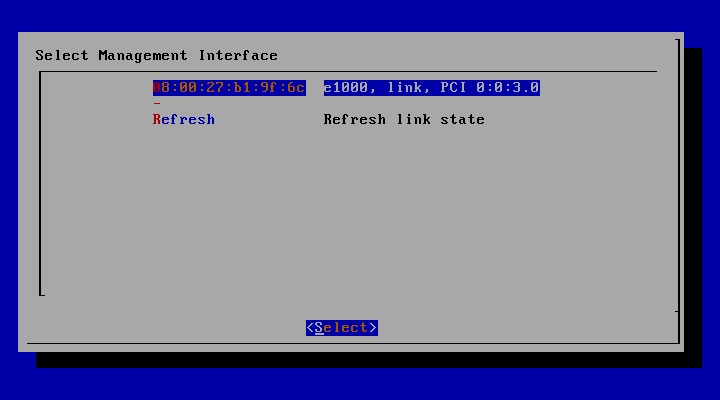
=> interface 선택
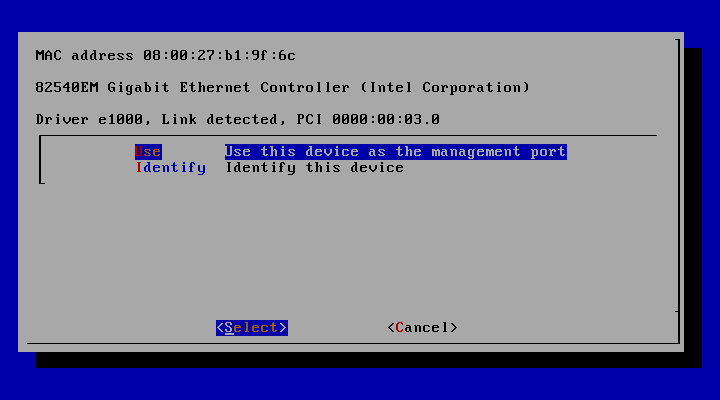
=> select 선택하여 다음으로 진행
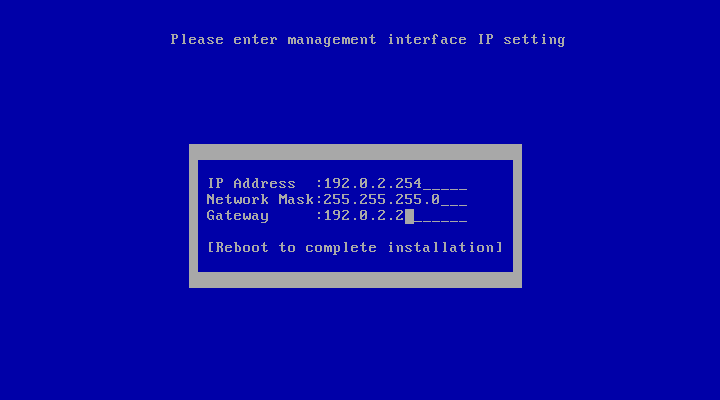
=> 네트웍 정보 입력
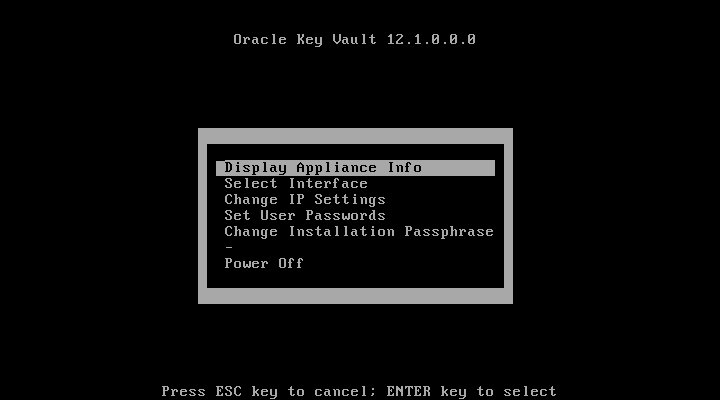
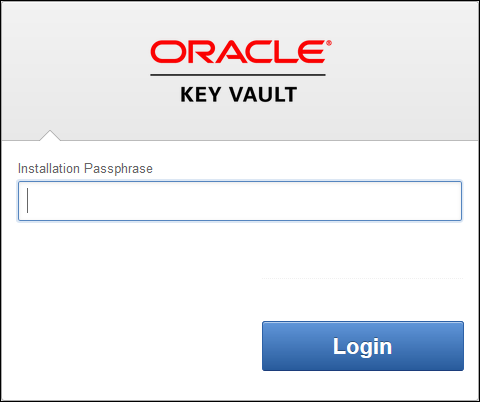
=> 설치가 완료후 위와 같은 화면이 표시됨install후 진행과정
postinstallation tasks에서 administrative user accouts, recovery passphrase, and optionally, dsn 설정을 진행
1) open a web browser
2) oracle key value 서버에 접속 => https://192.0.2.254 (위에 install 과정시 지정한 ip 주소)
인증키에 대해 untrusted 메시지가 나올 경우 무시하고 계속해서 진행
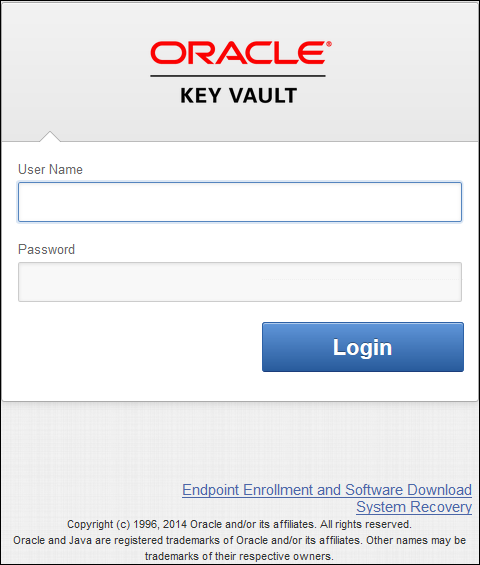
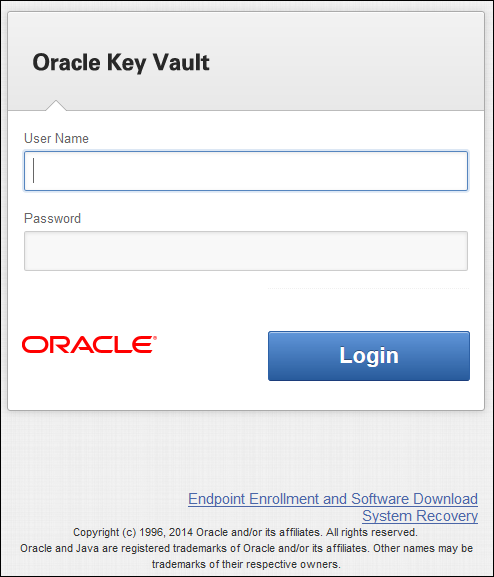
3) 다음 화면이 나오면, 초기 입력한 패스워드를 입력하고 login in 수행
4) one time post-install 설정 페이지에서 아래와 같은 정보 입력
- Administrative role information (key, system, audit 계정 설정)
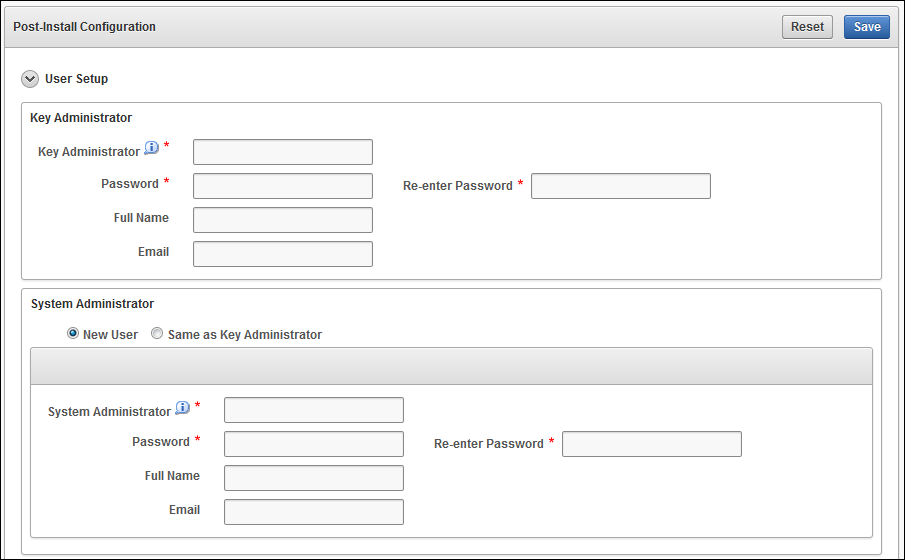
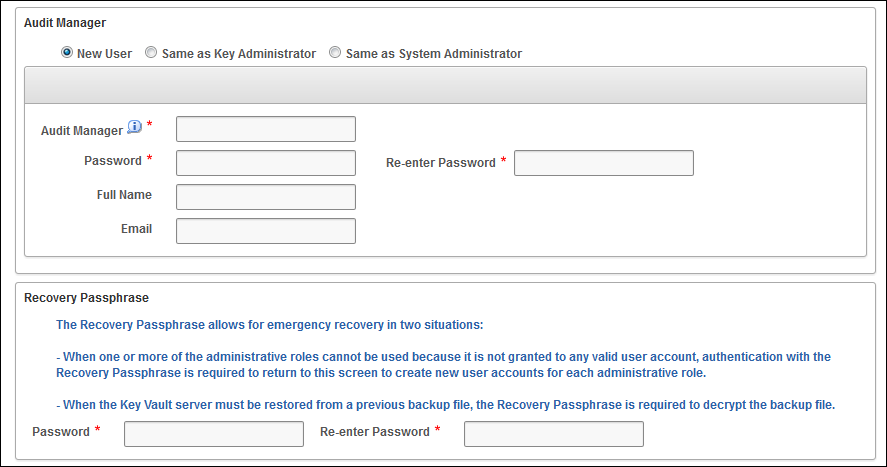
- Recovery passphrase (backup 데이터 접근시 사용하는 패스워드 설정, 새로운 roles 또는 복구시 사용)
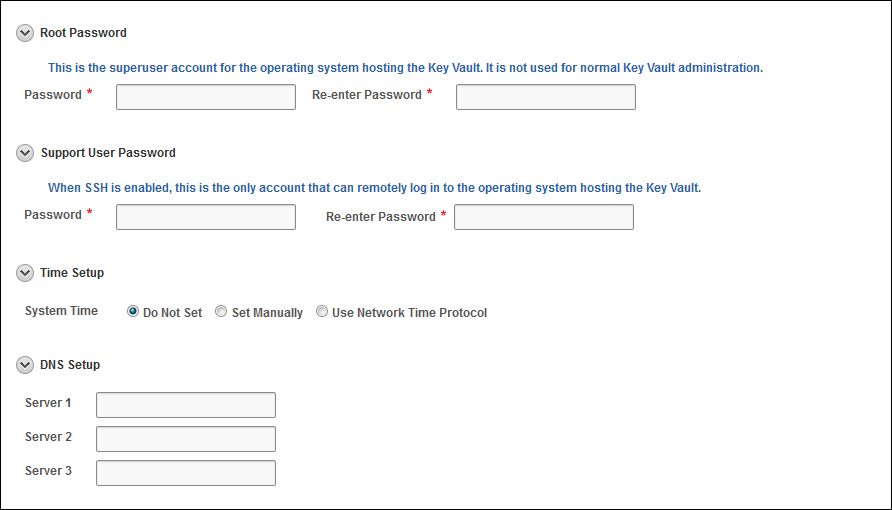
Root/Support 패스워드는 복구시 기존에 백업과 동일하게 복구, Time과 DNS 입력
5) 지금까지 입력한 정보를 저장 (save)
입력 완료후 로그인 화면으로
Management console
key vault에 대한 대부분에 작업을 수행하기 위해 아래와 같이 웹페이지 로그인하여 작업을 수행
1) open a web browser
2) https 웹페이지 접근
https://192.0.2.254 (이전에 셋팅한 ip address)
- Endpoint 추가
1) endpoint 등록 2가지 방식
- Administrator-initiated enrollment : system administrator에 의해 생성
- Endpoint self-enrollment : test 목적으로 유용하며, share 되지 않은 개별키 저장시 적합
2) endpoint 등록 상태
- Registered : admin에 의해 endpoint가 등록되고 enrollment token이 발급되어 있는 상태
하지만, okvclient.jar 파일 endpoint에 download 되지 않은 상태
- enrolled : endpoint가 enrollment token를 가지고 있는 상태
3) endpoint 등록
- Key vault management로 로그인
- endpoint tab에서 endpoint 선택
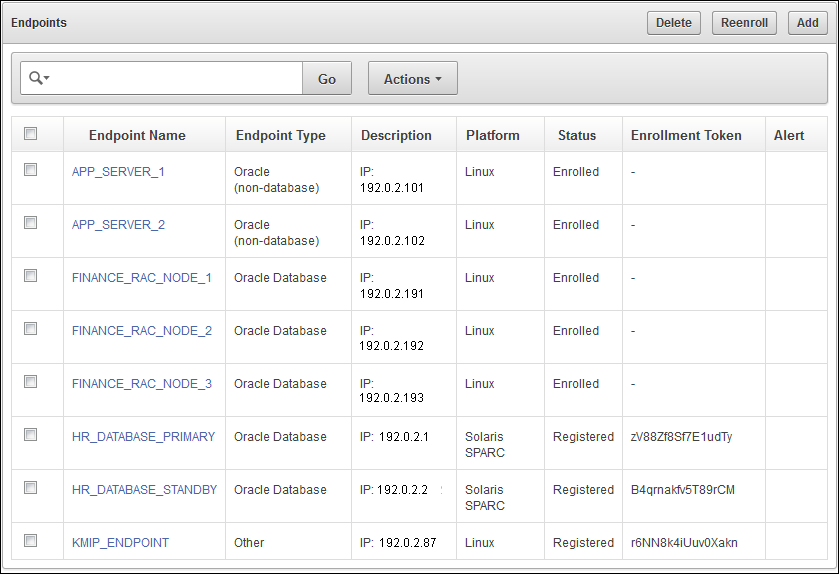
- 위에 화면에서 add 버튼 선택후 아래 정보 입력
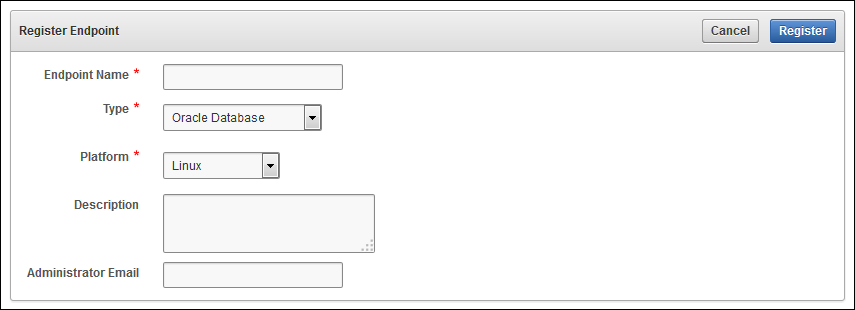
- register 버튼 click (temporary one-time token 생성)
4) endpoint 삭제 또는 재동록
- Log in to the Oracle Key Vault management console
- Select the Endpoints tab, and then select Endpoints.
- Select the check box beside the endpoint name
- Click Delete or Enroll
5) endpoint를 group 추가
- Log in to the Oracle Key Vault management console
- Select the Endpoints tab, and then select Endpoints
- Select the endpoint to be added to a group
- Click Add in the Endpoint Group Membership region of the Endpoint Details page
- Click Save - endpint groups 추가
1) endpoint group 추가
- Log in to the Oracle Key Vault management console
- Select the Endpoints tab
- Select Endpoint Groups
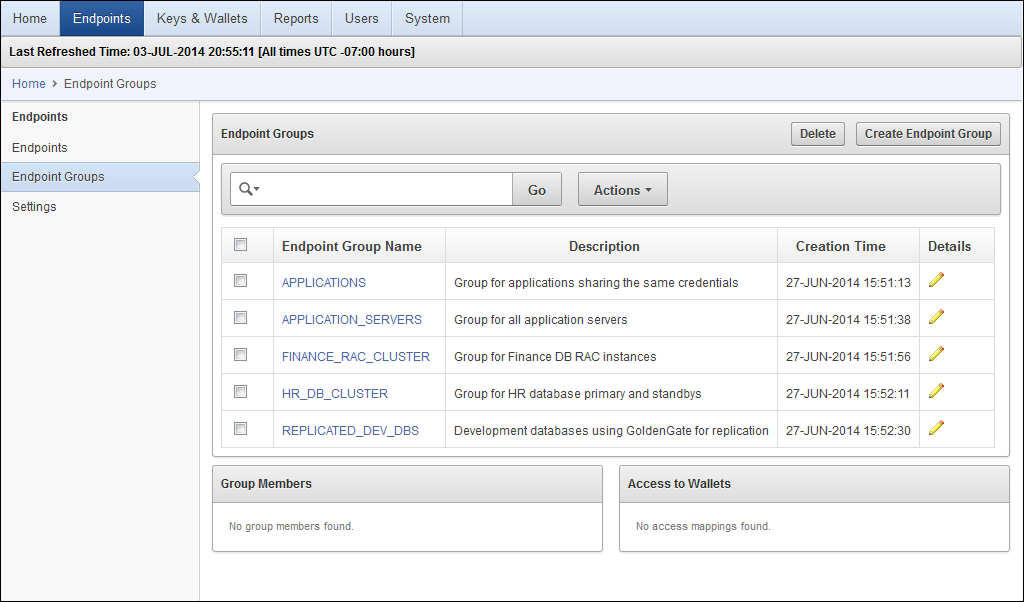
- Click the Create Endpoint Group button
- On the Create Endpoint Group page, enter the name of the new group and a brief description
- Select the check box next to each endpoint name that you want to add to the group
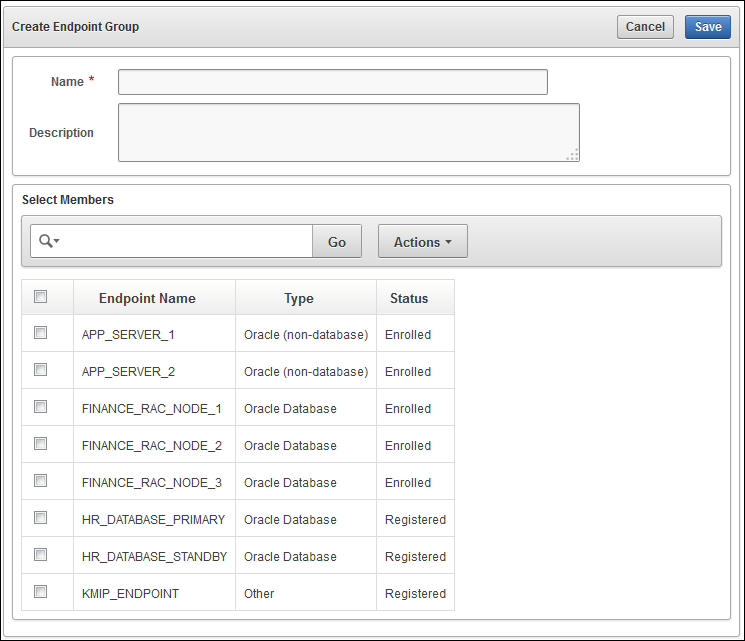
- save - endpoint client 설치 및 구성
1) enrool and provision the endpoing
- As an endpoint administrator, log in to the endpoint (db 서버)
- Connect to the Oracle Key Vault management console
https://192.0.2.254
- When the Oracle Key Vault management console login page appears, do not log in
- Under the login area, click the Endpoint Enrollment and Software Download link
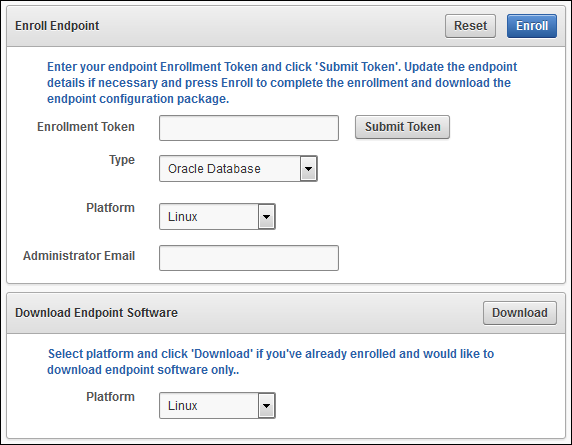
- Under Enroll Endpoint, do one of the following:
Enter the enrollment token that was supplied by the Oracle Key Vault user with the System Administrator role and press Submit Token
- Click Enroll to complete the process
- Save the file to the desired location
- Install theokvclient.jarfile on the endpoint
2) install the oracle key vault client software
- Ensure that you have the necessary privileges to install software on the endpoint.
- Ensure that you have JDK 1.4 or later installed and that thePATHenvironment variable includes thejavaexecutable
- Navigate to the directory in which you saved theokvclient.jarfile
- Run thejavacommand to install theokvclient.jarfile
java -jar okvclient.jar -d /home/oracle/okvutil -v
The-dargument specifies the directory location for the Oracle Key Vault software and configuration files, in this case, the$OKV_HOMEdirectory
- When prompted, do one of the following to store the credentials for accessing Oracle Key Vault in an Oracle wallet file
a. For a password-protected wallet, enter a password between 8 and 30 characters, and then press Enter. This password will be required when the endpoint connects to Oracle Key Vault.
(If necessary, you can change this password later on by using theokvutil changepwdcommand.)
b. For an auto-login wallet, do not enter a password. Press Enter only. No password is required when the endpoint connects to Oracle Key Vault
- If you are planning to use a TDE direct connection, then runroot.shto copy theliborapkcs.sofile (located in thelibdirectory) to the following directory
sudo ./$OKV_HOME/bin/root.sh (/opt/oracle/extapi/64/hsm/oracle/1.0.0)
-OKV_HOMEset
3) okvutil utility 사용
Theokvutilutility syntax enables you to list, download, upload, and change passwords for security objects.
- okvutil command arguments [-v verbosity_level]
okvutil list [-l location -t type | -g group] [-v verbosity_level] type : wallet, jks, jceks
exam) okvutil list -t WALLET -l /home/oracle/wallets
okvutil upload [-o] -l location -t type [-g group] [-d description] [-v verbosity_level]
exam) okvutil upload -l ./fin_jceks.jck -t JCEKS -g fin_wal -v 2
okvutil upload -l . -t WALLET -g FinanceWallet (input password without password)
okvutil download -l location -t type [-g group | -i object_id] [-o] [-v verbosity_level]
exam) okvutil download -l ./fin/okv/work -t JCEKS -g FinanceWallet
theokvutil changepwdenables you to change the password of a Key Vault endpoint.
okvutil changepwd -l ./home/oracle/okvutil/ssl -t WALLET
For a password-protected wallet, enter a password between 8 and 30 characters, and then press Enter. This password will be required when the endpoint connects to Oracle Key Vault. (If necessary, you can change this password later on by using theokvutil changepwdcommand.)
- 기존 TDE wallet 를 oracle key vault로 마이그
1) Back up the database that contains the data that you want to migrate
2) Complete the enrollment of the endpoint
3) If you have not done so already, then upload the existing Oracle wallet to Key Vault, by using theokvutil uploadcommand
4) Configure the Oracle Databasesqlnet.orafile for the HSM as follows
ENCRYPTION_WALLET_LOCATION=(SOURCE=(METHOD=HSM)(METHOD_DATA=(DIRECTORY=wallet_location)))
5) Reconnect to the database if you are in SQL*Plus
6) Query theV$ENCRYPTION_WALLETdynamic view to ensure that theMETHOD_DATAsetting in thesqlnet.ora filechanged. The output of the query should now showMETHOD=HSM
SELECT * FROM V$ENCRYPTION_WALLET;
7) If the endpoint is a Release 11gR2 Oracle database, then close the local Oracle wallet and open the HSM wallet
- auto login case
oracle$ cd <wallet location>
oracle$ mv cwallet.sso cwallet.sso.bak
sqlplus> alter system set wallet close;
- password-protected case
alter system set wallet open identified by "<HSM connect string>";
8) Migrate from TDE wallets to Oracle Key Vault
- with password for installing endpoint client software
alter system set encryption key identified by "<endpoint password>" migrate using "<wallet password>";
- auto login case
alter system set encryption key identified by "null" migrate using "<wallet password>";
9) Open the wallet. If the endpoint requires a password to connect to Oracle Key Vault, then enter the password
ALTER SYSTEM SET ENCRYPTION WALLET OPEN IDENTIFIED BY "Key_Vault_endpoint_password";
10) After you complete the migration, if you are using an auto-login wallet, then re-enable it by renaming thecwallet.sso.bakfile tocwallet.sso High Availability, backup and restore.
분리된 2대에 appliacees를 준비해서 각각 서버에 인증서를 copy 및 복제
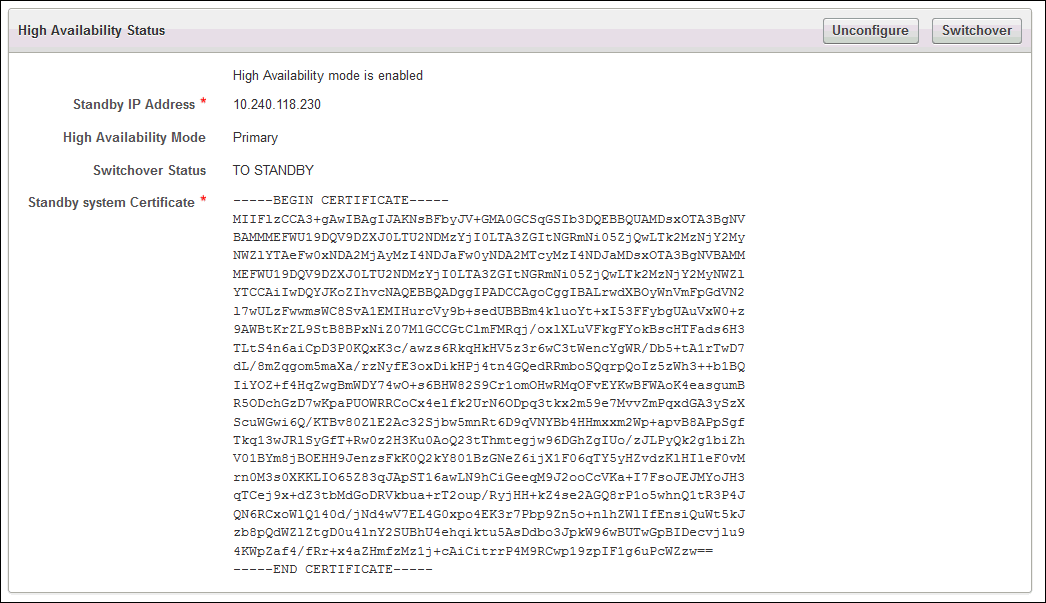
1) High Availability
- Acquire the IP address and certificate for both of the appliances involved as follows:
- Go to the Oracle Key Vault management console for the standby appliance- From this appliance, select the System tab
- Click the High Availability menu
- Enter the IP address of the primary server in the Peer system IP Address field
- Paste the certificate of the primary server in a Peer system Certificate
- Click Save
- Log in to the Oracle Key Vault management console for the primary appliance
- Select the System tab/the High Availability menu
- Select the Configure this system as the Primary server check box
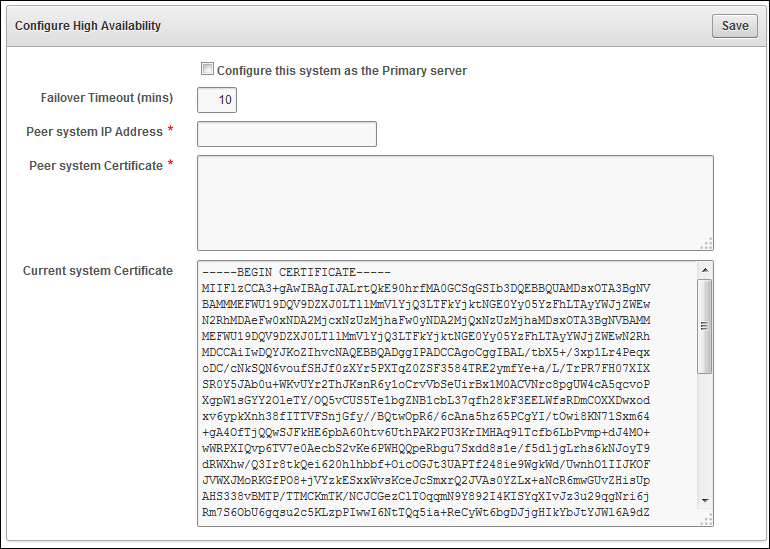
Failover Timeout를 입력 (10분 입력시 10분후 take over 수행)
- In the Peer system IP Address field, enter the IP address of the standby server as a peer system
- In the Peer system Certificate field, paste in the certificate of the standby server as a Peer system
- Click Save
- Click Activate (시스템 reboot 발생)
2) Backup
- Select the System tab, and then click the System Backup menu
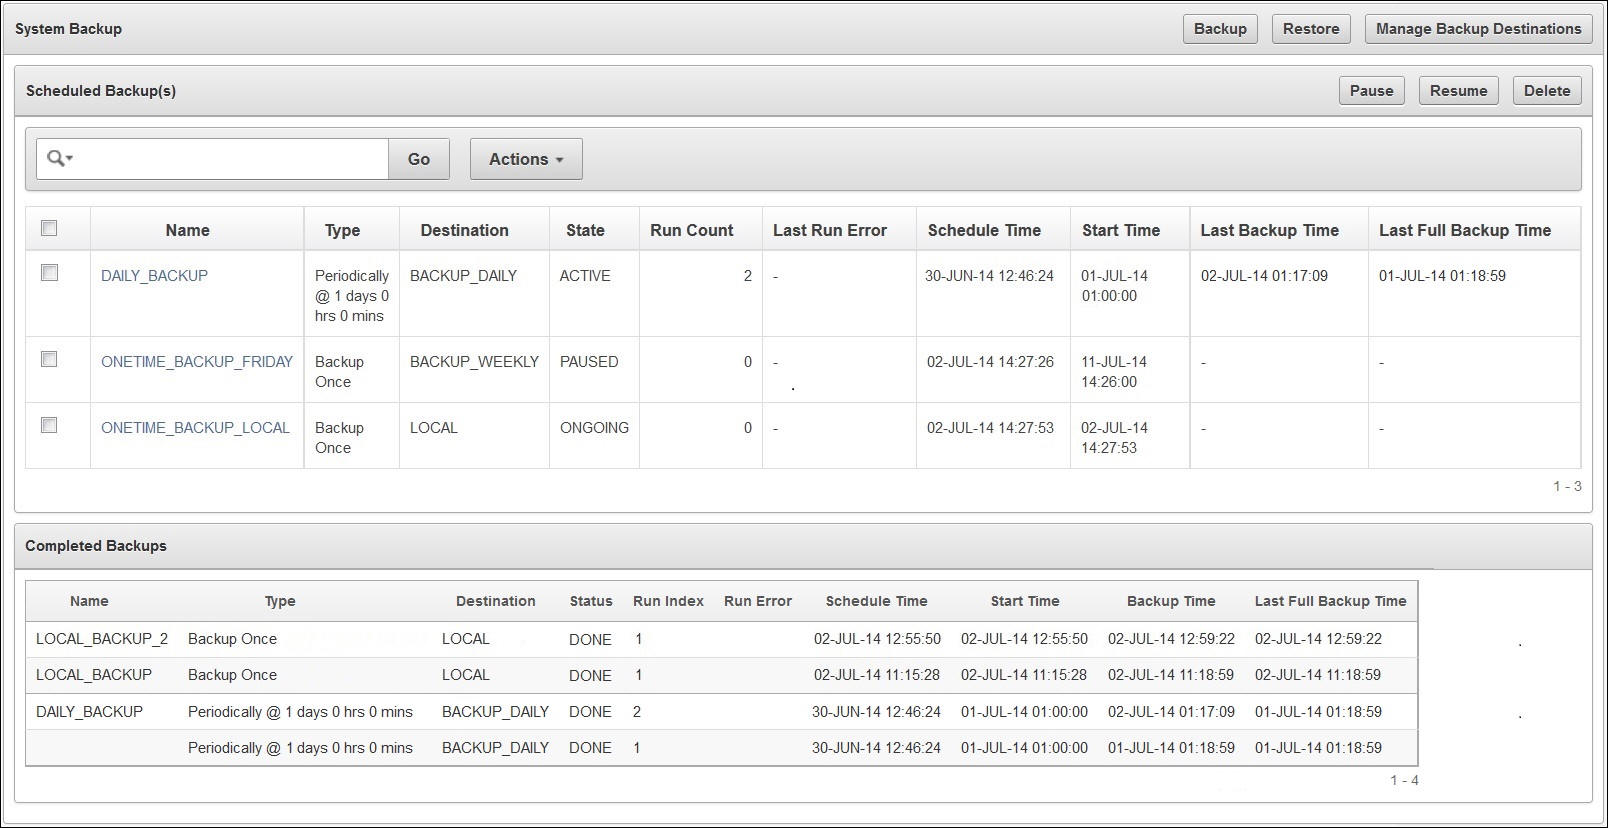 - Click Manage Backup Destinations
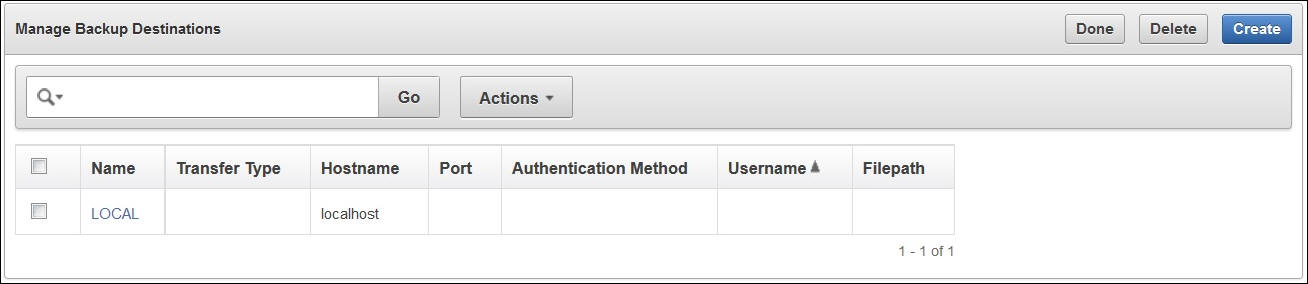
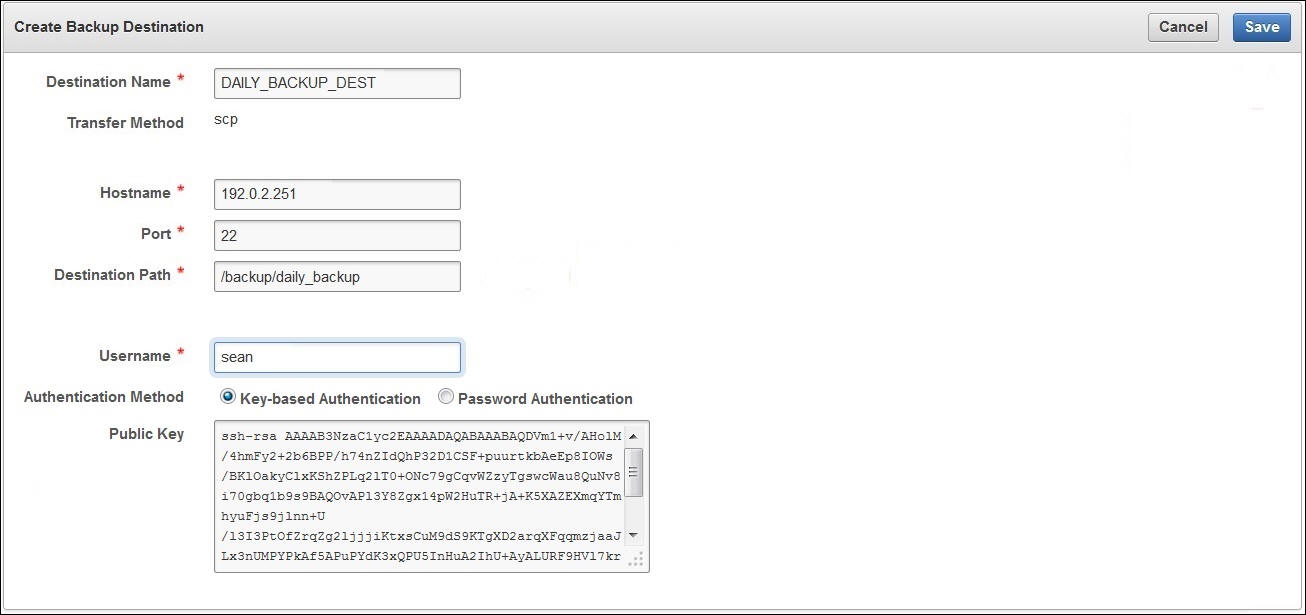
- Select Create to create a new remote backup destination, which will appear in the table
백업은 스케쥴이 가능하며, 해당 스케쥴을 작성하여 등록하여 수행
# keyvault autologin : doc 2120160.1
'RDB > Oracle' 카테고리의 다른 글
| logmnr 설정 (0) | 2017.07.18 |
|---|---|
| DBCA 오라클 DB생성 (0) | 2017.01.23 |
| oracle rac tde (0) | 2016.12.08 |
| Oracle RAC: Rotating the TDE Master Key and Oracle Wallet Password with a Wallet Copy on Each Node (0) | 2016.12.08 |
| Oracle Odbc를 사용한 MySQL 데이터 연결 (0) | 2015.12.07 |